My Ethereum Validator Setup at Home
Numerous tutorials exist on becoming an Ethereum validator from home, and I’ve chosen to follow one in particular to set up my own…
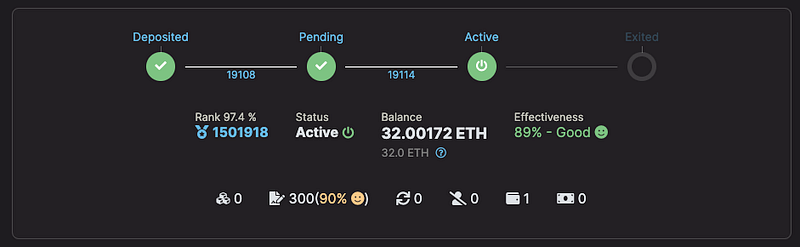
Numerous tutorials exist on becoming an Ethereum validator from home, and I’ve chosen to follow one in particular to set up my own validator. The purpose of this blog entry is to share my experience throughout this process, offering a unique perspective for those interested in trying it out.
A few years ago, I ventured into GPU mining using Proof of Work technology. However, towards the end, this activity ceased to be profitable, in addition to causing considerable wear on the hardware and high energy consumption. Subsequently, Ethereum transitioned to Proof of Stake, eliminating the need for GPUs and significantly reducing the energy consumption to maintain the blockchain. Despite this, the new conditions imply higher costs. Even so, exploring new processes and technologies always proves enriching and educational.
For several years in the web3 ecosystem and attending Ethereum-related events, I have always been fascinated by the idea of having a node and becoming an Ethereum network validator, thus contributing to decentralization and delving into more advanced technical aspects. However, there are economic barriers that can be challenging for those interested.
The first, and perhaps the least complicated, is to have equipment that meets certain minimum specifications:
- Operating System: 64-bit Linux (for example, Ubuntu 22.04.1 LTS Server or Desktop).
- Processor: For Testnet — Dual core. For Mainnet — Quad core or higher.
- Memory: For Testnet — 16GB RAM; For Mainnet — 32GB RAM.
- Storage: For Testnet — 1TB SSD; For Mainnet — 2TB NVME.
- Internet: Stable broadband connection, with 10 Mbps upload/download, ideally with no data limit.
- Data Plan: Minimum of 2 TB per month, preferably unlimited.
- Power: Reliable electrical supply, recommended to have a UPS (Uninterruptible Power Supply).
This equipment must be dedicated exclusively to this function, as it cannot be used for other tasks while operating as a validator. The cost can vary considerably.
I opted for an intermediate configuration between the requirements of Testnet and Mainnet:
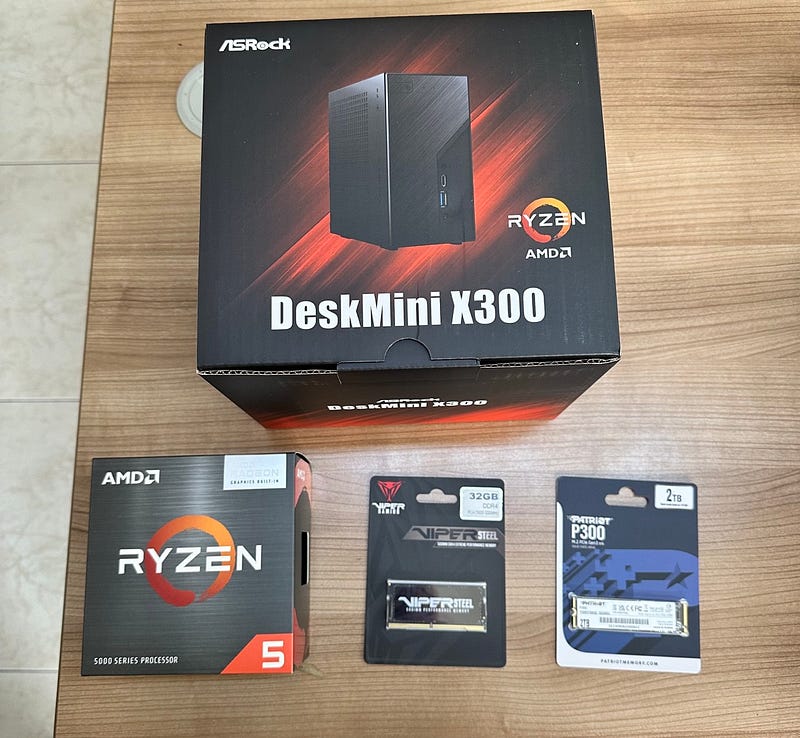
- PC Mini Asrock X300 (mini case, power supply, and motherboard)
- Processor: AMD RYZEN 5 5600G, 6 Cores — 100–100000252box
- RAM Memory: DDR4 1 x 32 GB Patriot, Bus 3200 Mhz — pvs432g320c8s
- Solid State Drive: M.2 Patriot 2 Terabytes P300 — p300p2tbm28
- UPS: UNITEC 2000VA-1200W interactive — UN-I2000VA
The approximate cost is $650 USD.
The second condition involves having 32 ETH to lock up as collateral and obtain permission to start operating as a validator, which represents a considerable investment. However, this time, I will be conducting tests on the Holesky network, as mentioned earlier. Another motivating factor is the recent emergence of opportunities to participate as a validator with a smaller investment, like 1 ETH, which makes the experience worthwhile.
The indicated tutorial is designed to set up a validator from scratch and use it on the Holesky test network, created specifically for this type of testing. For other applications such as DeFi or NFTs, the Sepolia testnet is used.
Here is the information to add the Holesky network to your wallet:
- Network Name: Holesky Test Network
- New RPC URL Address: https://ethereum-holesky.publicnode.com/
- Chain ID: 17000
- Currency Symbol: ETH
- Block Explorer URL Address: https://holesky.etherscan.io/
Key Sections Explained in General Terms
- Node Setup: Prepare your system to connect and support the Ethereum network.
- Execution Client Installation: Install the necessary software to process transactions and maintain the blockchain state.
- Consensus Client Installation: Set up the software responsible for managing the validation rules and the agreement of new blocks.
- Validator Installation: Establish the system that allows proposing and verifying blocks on the network.
- Maintenance: Monitor and regularly update your system to ensure its optimal operation and security.
Considerations During the Process:
While following these sections, I kept some things in mind, such as:
- Importance of Continuous Connection: Not being online has negative consequences; therefore, it is recommended to use a UPS to ensure that the system operates 24/7.
- Penalties and Maintenance: It is important to consider the penalties for the ETH locked in case of bad practices, which requires paying attention to each step of the process and performing regular maintenance on the equipment.
- Ideal Equipment Installation: It is ideal to install the equipment from scratch with Ubuntu, as this facilitates the configuration and optimization of the system for the specific needs of the validator.
- Data Annotation: It is crucial to note down every piece of data generated, including passwords.
- Port Enabling: This step is crucial to ensure good communication.
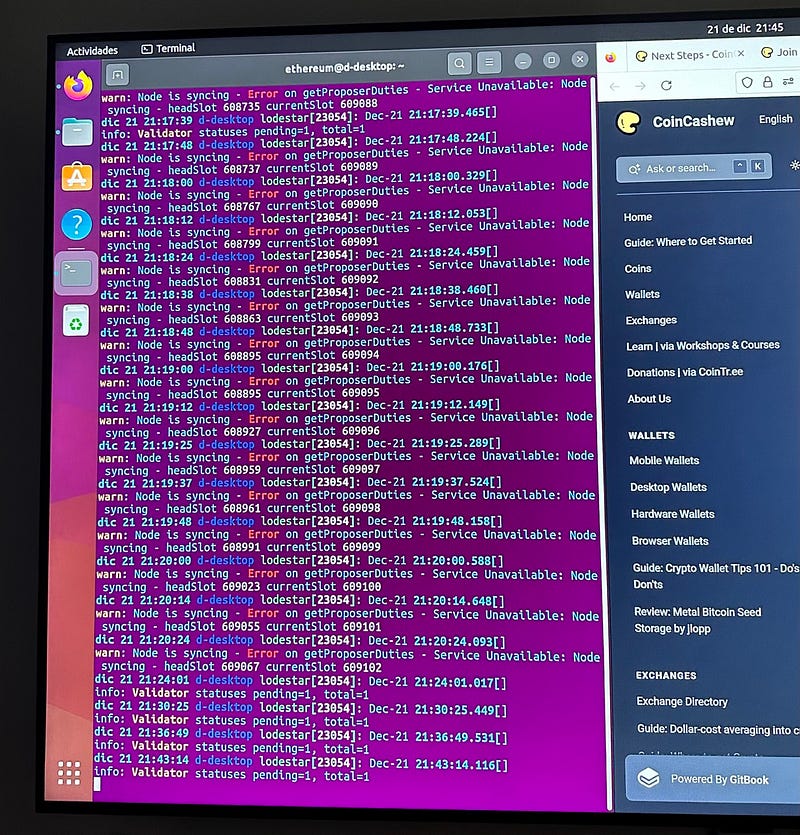
- Choice of Clients: It is necessary to choose an execution client and a consensus client. In my case, I opted for Nethermind for execution and Lodestar for consensus.
- Lodestar Configuration: During the installation and configuration of Lodestar, it is necessary to create a “consensus.service” file. In a section of this file, a wallet is added for -suggestedFeeRecipient. I used the address of my personal hardware wallet, which is the one that will receive the additional ETH generated by the validator.
- Withdrawal Address: I used the same address for the withdrawal address, an important detail in the validator key creation process.
- Key Generation in Ubuntu: I used the “staking-deposit-cli” tool in Ubuntu to generate the keys. It is important to note down and securely store the generated phrase.
- Generated Files: Two files will be created: “keystore-######.json” and “deposit_data-#####.json”. The former is for the validator to sign transactions and must be kept private. The latter contains public information of the validator.
- Registration in Holesky: Subsequently, you must visit https://holesky.launchpad.ethereum.org/ and follow the instructions at the end of the guide to upload the public file “deposit_data-#####.json”. This will allow sending the ETH to the contract to request to be a validator. (Note: I tried signing with a hardware wallet without success, so I resorted to a normal MetaMask wallet).
- Confirmation of Validator Address: At one point in the process, you will receive a confirmation of your public validator address, for example, 0x87cccd……a1265. Then you can enter this address in https://holesky.beaconcha.in/validator/ to generally check the status of your validator.
- Validator Installation: Finally, I followed the last step of the guide to install the validator and waited until the next day to confirm my acceptance as a validator on the previously mentioned Holesky page.
- Validator in Operation: Now I have a validator operating from my home.
Link to the Followed Tutorial:
Guide | How to set up an Ethereum staking validator on the HOLESKY testnet
Updates and Additional Learnings
Throughout my journey in setting up and operating an Ethereum validator node, I’ve encountered and overcome several challenges, leading to valuable insights that might interest those engaged in similar endeavors.
Unlocking Time and Exit Process
According to various sources, the minimum time to unlock and receive the 32 staked ETH is about 9 days. Once this period was up, I started the process to stop validating and issue the voluntary exit command. I learned that this step is crucial during the initial setup of the validator. However, I faced a challenge: there was no information on how to enable the REST-API of the consensus client, in my case, Lodestar. Standard commands for initiating voluntary exit were ineffective. After several trials, I managed to activate the API and, using the help commands, generated the necessary command for exiting:
./lodestar validator voluntary-exit --network holesky --importKeystores $HOME/staking-deposit-cli/validator_key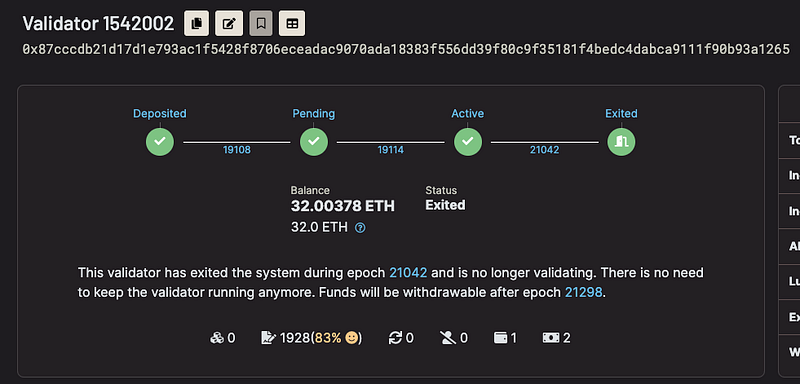
Handling MEV and Validator Efficiency
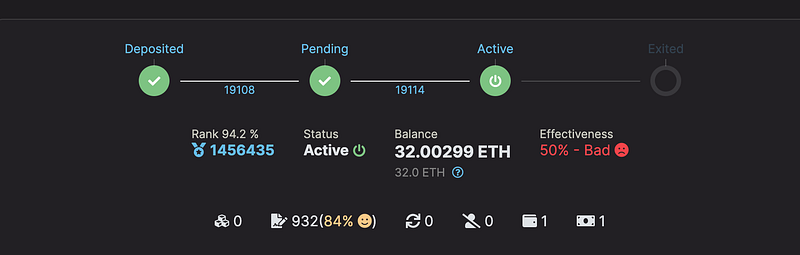
During the tests, I ran some Maximal Extractable Value (MEV) processes. However, I found that errors in these processes not only failed to increase revenue generation but also led to the loss of many attestations, decreasing the validator’s efficiency. Therefore, I decided to remove them. In a real validation scenario, it is crucial to carefully review these processes. Additionally, the additional use of the equipment can also negatively affect the validator’s effectiveness.
Losing the Fear of Missing Attestations
An interesting aspect is that I lost the fear of missing attestations. Although they have a cost, they do not carry significant penalties. This does not mean it’s okay to leave the validator disconnected, but it does provide some peace of mind in case of potential network, power, or equipment issues.
Maintenance and Using Cloud for Validation
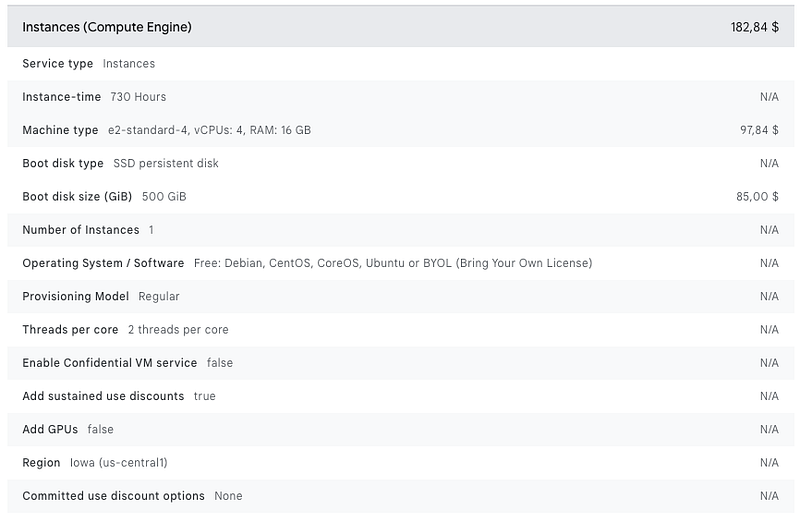
I explored a hypothetical case where it was necessary to shut down the equipment for maintenance, without stopping the validation. I used Google Cloud to create a temporary machine, transferred the keys from the physical validator to the cloud one, and it worked well for a few hours. However, later I encountered difficulties in accessing it, suggesting that it is a viable option for temporary replacement. It’s crucial to remember not to use the keys on both machines simultaneously, as this does incur penalties.
Funds and Wallet Management
I reviewed whether it would be better to use the same wallet to send the funds and to receive the stake and fees. This seems to be an efficient strategy, simplifying the management of funds.
Future Plans for Enhanced Monitoring with Remote Desktop and Dashboards
During the setup, I integrated Microsoft Remote Desktop for more effective remote control of the node. This addition has significantly simplified the management and monitoring of the system from a distance.
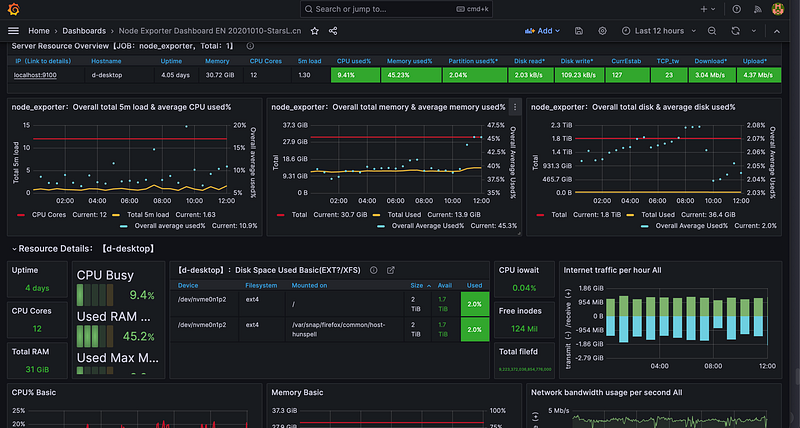
In terms of monitoring, I have set up a preliminary dashboard using Grafana and Prometheus. These tools offer in-depth insights into the system’s performance. However, while configuring these dashboards, I realized the complexity of their interface and the vast amount of data they can display.
In conclusion, while the current setup is functional, I see significant potential for enhancing its efficiency and usability through tailored dashboard organization in the near future.
Conclusion and Next Steps
Through direct experimentation, I have gained a thorough understanding of the validation process, giving me confidence for potential operations on the mainnet. I’ve also identified challenges to delve into, such as MEV management and setting up a backup system. Moreover, I’ve acquired notions of security to protect the validator’s keys. In summary, despite some challenges, the process is relatively straightforward once fully understood.